Hardwood flooring adds unmistakable warmth, beauty, and long-term value to any home. Beyond its aesthetic appeal, it also offers durability, improved indoor air quality, and timeless versatility that enhances nearly any interior style. If you’re planning to upgrade your home in Nashville TN and surrounding areas, understanding what happens during the installation process helps ensure you’re prepared, confident, and satisfied with the final results. From material acclimation to subfloor preparation and post-installation care, each step plays a crucial role in achieving a flawless finish.
At C&S Flooring, we believe that an informed homeowner is an empowered homeowner. This step-by-step guide walks you through everything you can expect before, during, and after hardwood floor installation, so you know exactly how your new floors will come to life.
Step 1: Initial Consultation and In-Home Assessment
The first step begins long before any tools touch the floor. A professional installer will visit your home, inspect the subfloor, evaluate moisture levels, take measurements, and discuss your style preferences and lifestyle needs. This consultation sets the stage for a smooth installation.
During the assessment, the installer will examine:
- Current flooring type and condition
- Subfloor levelness and stability
- Moisture readings in the home and subfloor
- Transitions between rooms and existing flooring
- Material options such as solid hardwood or engineered hardwood
This is also the time to discuss species, finish options, plank sizes, and color selections. Your installer will give you an estimated timeline and answer any questions about the process. At C&S Flooring, we take this stage seriously to ensure accuracy and transparency from day one.
Step 2: Delivery and Acclimation of Hardwood Materials
Hardwood is a natural material that expands and contracts according to temperature and humidity. To prevent future warping or gapping, the flooring must acclimate to your home’s environment.
This step usually takes 3–7 days, depending on the product and the season in Nashville TN. During this time, the unopened boxes of wood planks are stored inside your home, allowing humidity and temperature to stabilize.
Proper acclimation ensures:
- Consistent moisture content
- Stable installation conditions
- Long-term durability
Skipping this step is one of the biggest mistakes inexperienced installers make, which is why C&S Flooring follows industry-recommended acclimation protocols.
Step 3: Preparing the Work Area
Before installation begins, your space needs to be cleared and properly prepped. This includes:
- Removing furniture and personal items
- Removing existing flooring
- Protecting adjacent areas from dust
- Ensuring adequate ventilation
Some flooring types—such as carpet or vinyl—may require additional subfloor cleaning or patching once removed.
The preparation stage also includes bringing tools, equipment, and materials into the workspace and performing a final inspection before installation begins.
Step 4: Subfloor Preparation and Repairs
A stable, level subfloor is one of the most important factors for a successful hardwood installation. Whether you’re installing over plywood, OSB, or concrete, the subfloor must be structurally sound and clean.
During this stage, installers may perform:
- Leveling uneven areas
- Repairing squeaky boards
- Installing underlayment
- Checking moisture levels
- Sanding high spots
- Reinforcing weak sections
Your subfloor is the foundation of your hardwood flooring. Proper preparation ensures that your new floors feel solid, look seamless, and last for decades.
Step 5: Hardwood Layout and Design Planning
Hardwood flooring installation is part craftsmanship, part precision planning. Before laying the first plank, professionals establish a layout that ensures visual balance and structural stability.
This includes:
- Determining board direction based on room shape and natural light
- Planning starting points and reference lines
- Dry-laying select planks to preview patterns
- Mixing boards from multiple boxes to blend variations in grain and color
A well-planned layout results in a visually pleasing flow from room to room and minimizes waste.
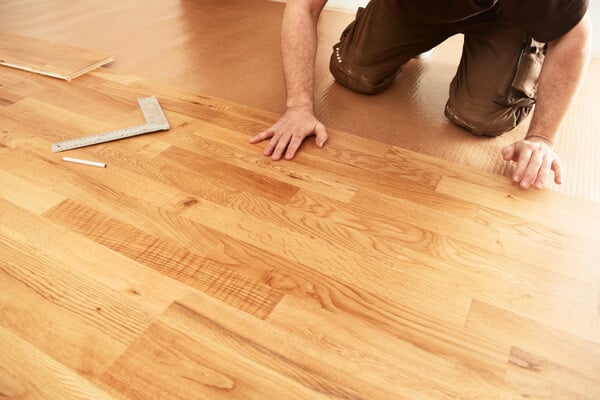
Step 6: Installation of Hardwood Flooring
This is where your space starts to transform.
Depending on the type of flooring you’ve selected, your installer will use one of three standard installation methods:
- Nail-Down Installation
Most common for solid hardwood, planks are nailed to a wooden subfloor using a flooring nailer or stapler. - Glue-Down Installation
Ideal for engineered hardwood over concrete. A strong adhesive secures planks to the subfloor for maximum stability. - Floating Installation
Used mostly with engineered hardwood. Boards lock together without being attached to the subfloor, allowing a bit of movement.
During installation, your installer will:
- Cut planks to size for walls, corners, and transitions
- Maintain even spacing and alignment
- Ensure proper expansion gaps around room edges
- Install transition moldings and thresholds
This stage often takes 1–3 days, depending on room size, layout complexity, and installation method.
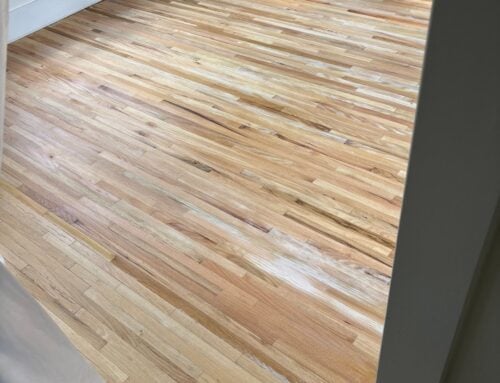
Step 7: Sanding and Finishing (For Site-Finished Floors)
If you selected unfinished hardwood, your floors will be sanded on-site to achieve a perfectly smooth surface. After sanding, the floor is cleaned thoroughly, and stain and protective finish layers are applied.
Typical finishing steps include:
- Rough sanding
- Fine sanding
- Application of stain (if desired)
- Multiple layers of polyurethane or oil finish
Each coat needs time to dry, so the finishing process may add 2–3 days to the timeline.
If you selected prefinished hardwood, this step is skipped, shortening the overall installation time.
Step 8: Clean-Up and Final Walkthrough
Once installation is complete, the work area is cleaned, debris is removed, and the floor is inspected for consistency and quality.
During the final walk-through, your installer will:
- Review maintenance and cleaning instructions
- Inspect transitions, trim, and thresholds
- Address any questions or areas of concern
- Ensure everything meets your expectations
At C&S Flooring, the final walk-through is an essential part of our process. We want you to feel confident and excited about your investment.
Step 9: Post-Installation Care and Maintenance Tips
Hardwood floors need proper care to stay beautiful. Homeowners should understand what to expect in the days following installation and how to maintain the floors long term.
Important guidelines include:
- Avoid heavy furniture placement for at least 24–48 hours
- Maintain indoor humidity between 35% and 55%
- Clean regularly using hardwood-safe products
- Use felt pads on furniture legs
- Never wet-mop hardwood floors
- Use area rugs in high-traffic areas
Following these recommendations will help your floors maintain their finish and structural integrity for years to come.
Bring Your Vision to Life—Schedule Your Hardwood Flooring Consultation Today
Hardwood floor installation is a transformative investment that enhances both aesthetics and property value. When you understand each step of the process—from consultation to final walkthrough—you can feel confident and prepared throughout your flooring project.
C&S Flooring is proud to serve homeowners across Nashville TN with professional hardwood installation, high-quality materials, and customer-focused service. Whether you’re renovating one room or your entire home, our team ensures a seamless experience and results you’ll love for decades.
If you’re ready to upgrade your home with beautiful hardwood flooring, contact C&S Flooring today to schedule your consultation.